A sure sign your renovation project is getting close to being complete is when the drywall that was installed, repaired or patched is now ready for paint.
But before you begin any painting you need to make sure you properly prep and prime the surfaces first.
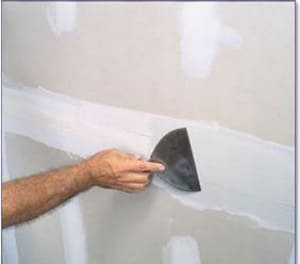 Here are our tips to properly prepping, priming and painting the walls to prevent you from having to redo it and to get a professional end result.
Tips On How To Prepare Walls Before Painting
Before painting you want to ensure you don’t skip one of the first and most important steps of preparing the walls so that you end up with the best looking results.
To help avoid and prevent paint problems such as the failure of paint not adhering properly because you skipped out on the pre-painting prep work, didn’t use a primer paint to properly give the drywall surface a foundation for which to apply the paint, and having to redo everything again yourself or hire professional painters near you here are tips we recommend you follow.
Prep Work Before Paint
A must before any paint application are getting the drywall repairs and patching out of the way first.
You want to ensure things like holes, cracks, gaps and other imperfections are fixed before you begin applying any primer and paint to help avoid having to fix problems with paint afterwards.
Here are some of our best tips to get you started.
Tip 1 : Inspect and Assess
To help prevent drywall problem and imperfections from appearing under the fresh new paint you want to start of with checking and assessing the walls and ceilings first.
Look for things like cracks, gaps, holes, nail pops, nicks, dents on both the walls and ceilings.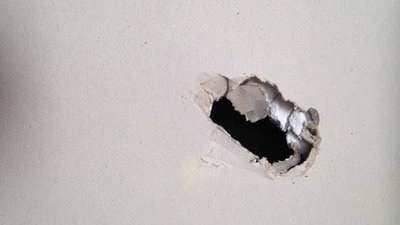
These types of issues are easily fixed and repaired by simply patching the areas with a drywall compound filler. This helps to fill the area, smooth out and even up things up.
While you’re inspecting the drywall for imperfections it is also the perfect opportunity to take a look at the baseboards, trim, door and window frames and other wood work like molding or wainscoting and use the right caulk to fill any of those holes or gaps as well.
Tip 2: Repair Walls Before Painting
By repairing any uneven surface, filling in the holes, nails, cracks gaps or even the joints of the new drywall installation will provide you with better painting results in the end.
Because the interior of your home is made up of drywall, plaster, wood trim, and baseboards, you want to ensure you take the necessary steps to prepare these surfaces before applying any paint.
In doing so you get a clean smooth surface once your finished paint application is complete.
To repair the simple nail pops, cracks on the walls and ceilings use a pre-mixed or mix it yourself drywall compound and fill the necessary areas.
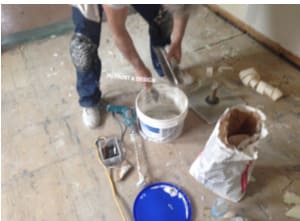
Apply at least 2 to 3 coats of drywall compound to the area and lightly sand in between each application. The third and final sanding will make it a smooth finish that is now ready for paint.
For smaller imperfections on drywall or wood work such as baseboards and trim use painter’s putty to fill in those spots. It’s commonly used for nail pops after removing picture frames or to fill in spots in the woodwork.
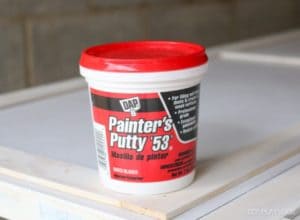
Simply apply a small enough amount with a finger and press into the gap to be filled. Lightly sand and prime the area before painting.
Tip 3: Sanding & Cleaning
Using a sanding block for small areas or a sheet of sand paper apply light pressure in a circular motion to sand down the areas where the drywall compound was applied.
Be sure to wipe away any debris or dust left behind by the sanding so that you have a smooth finish to work with.
Use a damp rag or a vacuum cleaner to remove as much of the dust left behind from the sanding. Don’t skip this part for if you do you will have the dust particles appear visible like sand bumps or bubbles under the fresh paint.
Tip 4: Caulking before Paint
It’s a good idea and we recommend to caulk the areas of the wood trim such as baseboards, any molding like cove or wainscoting, framing around windows and doors before you begin with any painting.
While in new homes you may notice gaps and cracks after a year the home was built. This is caused by the shifting and settling of the wood used for the fabrication of the home.
In older homes these gaps and cracks will appear over time because of the constant temperature changes in the house. These issues are common in both older and newer homes and are perfectly normal and easy to fix by applying caulk before paint.
Grab a damp paper towel or clean rag and have a finger ready to go and start caulking.
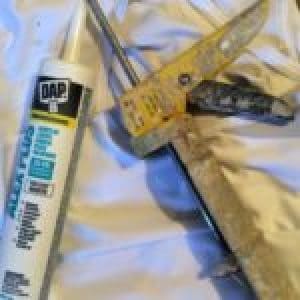
After cutting a 45 degree angle on the caulk tube start in one corner and give the caulking gu a light squeeze streaming it along the seams of the woodwork.
After you’ve covered a few inches worth, use a wet finger, apply light pressure and fun your finger through the caulking bead to ensure the area is filled. This also provides you with a smoothed out look of the caulk.
Continue doing the few inches of application, and smoothing it out until the entire area is completed. Note that the caulking must be completely dry before you do any painting over it.
Tip 5: Wallpaper Removal
If you have wallpaper in your home décor and want to remove it before painting a new colour you want to ensure that all it’s adhesive properties are removed and the walls are free of any residue or debris left behind.
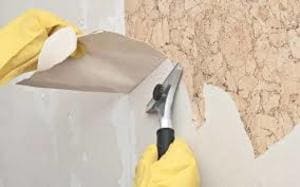
Remove the wallpaper by using a mix of warm water and DIF product be sure to follow the directions on the bottle especially for those stubborn paste removals.
You can also use a steamer by running the steam up and down the wallpaper a few times and then peel it off.
Warm water and a spray bottle with a sponge may also work sometimes. If the steam method doesn’t work use the recommended DIF product mixed in with warm water to remove the hard to get rid of wallpaper paste.
In spite of best efforts there is always a small trace of the paste left behind. If there is you can lightly sand it down and then wipe it clean.
Use an oil-based primer over the areas that the wallpaper has been removed to help prevent and residual remnants of the paste from rising up under a water-based latex paint topcoat.
Tip 6: When To Call In The Painters
If you don’t want to do all the pre-painting prep work, drywall patching and repairs, prime and paint yourself, it’s always best to leave it to the pros.
Hire the best painters near you with experience and knowledge to provide you with the best advice for your next painting project.
Contact your local painters in Ottawa for painting services
Article was originally published on May 11, 2017, Edited and updated on June 15, 2021
